Have you ever wondered how to make a Canadian email address?
Whether you’re moving to Canada, starting a business there, or simply want to establish a digital presence in the Great White North, having a Canadian email address can be incredibly useful.
In this comprehensive guide, I’ll walk you through the process step-by-step, sharing my personal experiences and tips along the way.
By the end of this post, you’ll have all the knowledge you need to create your very own Canadian email address.
Let’s dive in and unlock the power of a Canadian digital identity!
What You’ll Need to Make a Canadian Email Address
Before we jump into the nitty-gritty of how to make a Canadian email address, let’s make sure you have everything you need.
Here’s a quick checklist:
- A device with internet access (computer, smartphone, or tablet)
- Basic computer skills
- A strong, unique password
- Personal information (name, date of birth, etc.)
- A backup email address (optional but recommended)
Pro Tip: Having a secure password manager can make this process much smoother.
I personally use LastPass, but there are many great options out there like 1Password or Dashlane.
Now, let’s break down each item on this list:
- Device with internet access: This one’s pretty self-explanatory.
You’ll need a way to connect to the internet and navigate to the email provider’s website. - Basic computer skills: Don’t worry, you don’t need to be a tech wizard.
If you can browse the web and fill out online forms, you’re good to go. - Strong, unique password: This is crucial for protecting your new email account.
Aim for a mix of uppercase and lowercase letters, numbers, and symbols.
Avoid using personal information that’s easy to guess. - Personal information: Most email providers will ask for basic details like your name and date of birth.
Have this information ready to streamline the signup process. - Backup email address: While not always required, having a backup email can be a lifesaver if you ever get locked out of your account.
Remember, the key to successfully creating a Canadian email address is preparation.
With these essentials in hand, you’re ready to take the next step in your journey to obtain a Canadian email address.
Step-by-Step Instructions to Make a Canadian Email Address
Now that we’re prepared, let’s dive into the heart of how to make a Canadian email address.
I’ll guide you through each step, sharing insights from my own experience along the way.
1. Choose a Canadian Email Provider
The first step in creating your Canadian email address is selecting a suitable provider.
Here are some popular options:
- Rogers: A major Canadian telecommunications company
- Bell: Another leading Canadian telecom provider
- Shaw: Offers email services to its internet customers
- Telus: Provides email addresses with a @telus.net domain
- Outlook.ca: Microsoft’s Canadian email service
For this guide, I’ll use Outlook.ca as an example, as it’s widely accessible and doesn’t require a specific internet service provider.
Tip: Consider your long-term needs when choosing a provider.
If you plan to use other services (like internet or mobile) from the same company, it might be beneficial to choose their email service for better integration.
2. Create Your Account

Once you’ve chosen your provider, it’s time to create your account.
Here’s how to do it with Outlook.ca:
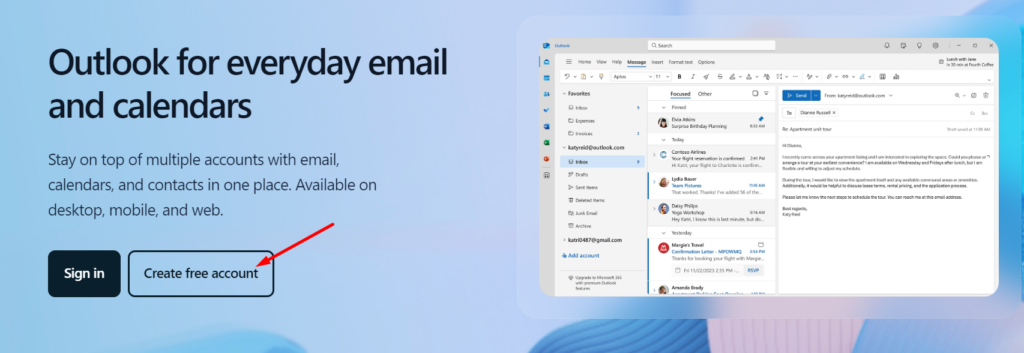
- Go to Outlook.com and click “Create free account”
- Choose your desired email address, ending in @outlook.com
- Create a strong password
- Enter your first and last name
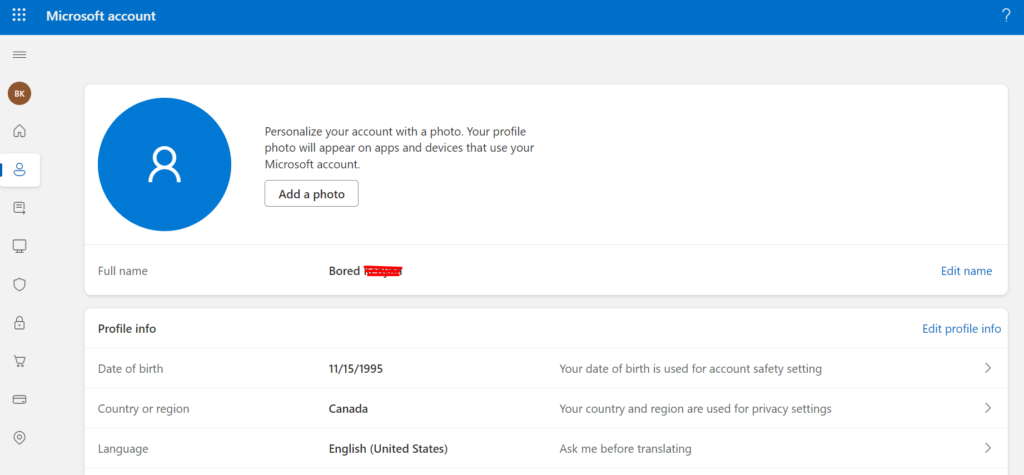
- Select your country (Canada) and date of birth
- Complete the CAPTCHA to verify you’re human
Warning: Be careful when entering your information.
Mistakes here can be difficult to correct later.
3. Set Up Your Email Address

After creating your account, you’ll need to set up your email address:
- Choose your display name (what recipients will see)
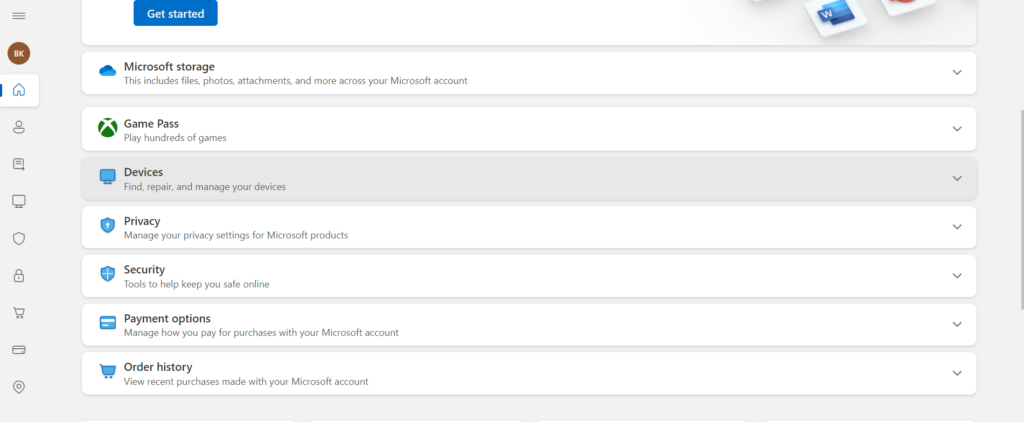
- Set up two-step verification for added security
- Add a recovery email or phone number
Pro Tip: Use a display name that’s professional and easy to remember, especially if you’ll be using this email for work or business purposes.
4. Customize Your Settings

Finally, take some time to customize your email settings:
- Set up email forwarding if desired
- Create folders to organize your emails
- Adjust your spam filter settings
- Set up an email signature
Tip: Don’t overlook this step!
Proper organization from the start can save you hours of frustration down the line.
You’ve successfully learned how to make a Canadian email address by following these steps.
But we’re not done yet – let’s explore some tips to make the most of your new email.
Tips to Make a Valid Canadian Email Address
Now that you know how to make a Canadian email address, let’s discuss some tips to ensure you get the most out of your new digital identity.
Use a professional email address format
Keep your password secure
- Use a unique password for your email
- Consider using a password manager
- Enable two-factor authentication
Regularly check your spam folder
- Important emails can sometimes be mistakenly flagged as spam
- Whitelist important contacts to ensure their emails reach your inbox
Set up email filters
- Automatically sort incoming emails into appropriate folders
- This can significantly improve your email organization and productivity
Use your Canadian email address consistently
- For job applications in Canada
- When signing up for Canadian services or websites
- For communication with Canadian government agencies
Pro Tip: If you’re using your Canadian email address for professional purposes, consider creating a signature that includes your contact information and any relevant professional details.
Remember, your email address is often the first point of contact between you and others in the digital world.
You’re not just learning how to make a Canadian email address – you’re learning how to make it work effectively for you.
Common Mistakes to Avoid
When it comes to how to make a Canadian email address, there are several pitfalls you should be aware of.
Here are some common mistakes and how to avoid them:
Using non-Canadian providers
Mistake: Choosing Gmail, Yahoo, or other non-Canadian services
Solution: Stick to Canadian providers or .ca domains for a true Canadian email address
Choosing an unprofessional email address
Mistake: Using nicknames, birth years, or funny phrases in your email address
Solution: Opt for a simple, professional format using your name
Neglecting security measures
Mistake: Using weak passwords or skipping two-factor authentication
Solution: Always use strong, unique passwords and enable additional security features
Forgetting recovery information
Mistake: Not setting up or updating recovery email/phone number
Solution: Keep your recovery information current to avoid being locked out of your account
Overlooking terms of service
Mistake: Not reading or understanding the provider’s terms of service
Solution: Take the time to review the terms to ensure you’re comfortable with them
Warning: Avoid using your Canadian email address for activities that violate Canadian laws or the provider’s terms of service.
This could result in your account being suspended or terminated.
Here, you’re not just learning how to make a Canadian email address – you’re learning how to create and maintain a reliable, professional online presence in Canada.
Troubleshooting And Fixing Issues
Even when you know how to make a Canadian email address, you might encounter some issues along the way.
Here are some common problems and their solutions:
Can’t access your account
- Problem: Forgotten password or locked out of account
- Solution: Use the “Forgot Password” option or contact customer support
Emails not sending or receiving
- Problem: Emails stuck in outbox or not receiving expected emails
- Solution: Check your internet connection, verify email settings, and check your spam folder
Account suspended
- Problem: Unable to access account due to suspension
- Solution: Contact your email provider’s support team to understand the reason and resolve the issue
Difficulty with email client setup
- Problem: Can’t set up your Canadian email on your preferred email client
- Solution: Double-check the server settings provided by your email provider
Spam filter issues
- Problem: Important emails getting marked as spam
- Solution: Add sender to your contacts list, check spam filter settings
Pro Tip: Keep your email provider’s support contact information handy.
They can be invaluable in resolving complex issues.
Remember, troubleshooting is a normal part of learning how to make a Canadian email address.
Don’t get discouraged if you encounter problems – with patience and persistence, you can overcome any email-related challenge!
Alternative Ways to Make a Canadian Email Address
While we’ve focused on how to make a Canadian email address through traditional providers, there are alternative methods worth considering.
Let’s explore some variations:
a). Domain-based email addresses
Method: Purchase a .ca domain and set up email hosting
When to use: Great for businesses or personal branding
Why: Provides a professional, customized email address
b). University or college email addresses
Method: Enroll in a Canadian educational institution
When to use: If you’re a student or alumni of a Canadian school
Why: Often comes with additional benefits and resources
c). Business email services
Method: Use services like Truehost Email Hosting, G Suite, or Microsoft 365 with a .ca domain
When to use: For small to medium businesses operating in Canada
Why: Offers advanced features and integration with other business tools
d). Temporary Canadian email addresses
Method: Use services that provide temporary .ca email addresses
When to use: For short-term needs or to protect your primary email from spam
Why: Offers privacy and convenience for one-time uses
e). VPN with regular email providers
Method: Use a Canadian VPN server with your existing email provider
When to use: When you need to appear as if you’re accessing email from Canada
Why: Provides flexibility without creating a new email address
Pro Tip: Consider your specific needs when choosing an alternative method.
Each option has its own advantages and potential drawbacks.
These alternatives showcase that there’s more than one way to achieve a Canadian online presence.
While they may differ from the traditional method of how to make a Canadian email address, they can be equally effective depending on your situation.
Conclusion
We’ve journeyed through the process of how to make a Canadian email address, exploring everything from choosing a provider to troubleshooting common issues.
Let’s recap the key points:
- Selecting a Canadian email provider is crucial
- Creating a professional, easy-to-remember email address is important
- Security measures like strong passwords and two-factor authentication are essential
- Customizing your email settings can greatly enhance your experience
- Being aware of common mistakes can save you from future headaches
- Knowing how to troubleshoot issues will keep your email running smoothly
- Alternative methods exist for creating a Canadian online presence
Remember, your Canadian email address is more than just a digital mailbox – it’s a gateway to Canadian online services, job opportunities, and connections.
Whether you’re a newcomer to Canada, a business owner, or simply someone who wants a local online presence, your Canadian email address is a valuable asset.
As you put your new knowledge of how to make a Canadian email address into practice, don’t be afraid to experiment and find what works best for you.
Your digital journey in Canada is just beginning, and your new email address is the first step towards many exciting possibilities.
So go ahead, create your Canadian email address, and start exploring all that the Canadian digital landscape has to offer.
Happy emailing, eh!
Read also:
FAQ Section
Q: Do I need to be a Canadian citizen to create a Canadian email address?
A: No, you don’t need to be a Canadian citizen. Anyone can create an email address with a Canadian provider or a .ca domain.
Q: Are Canadian email addresses free?
A: Many Canadian email providers offer free email addresses. However, some services, especially those with additional features, may charge a fee.
Q: Can I use my Canadian email address outside of Canada?
A: Yes, you can access and use your Canadian email address from anywhere in the world with internet access.
Q: How do I know if an email provider is truly Canadian?
A: Look for providers that are well-known Canadian companies or that use .ca domains. You can also check their “About Us” page for information about their Canadian operations.
Q: Can I change my email address after creating it?
A: This depends on the provider. Some allow you to change your email address, while others may require you to create a new account.
Q: Is a Canadian email address necessary for doing business in Canada?
A: While not strictly necessary, having a Canadian email address can lend credibility to your business and may be preferred by some Canadian clients or partners.
Q: How secure are Canadian email providers?
A: Canadian email providers generally follow strict privacy and security standards. However, always enable additional security features like two-factor authentication for best protection.
Q: Can I use my Canadian email address with my existing email client?
A: In most cases, yes. Most Canadian email providers support standard email protocols that work with popular email clients.
And that is how to make a Canadian email address.
If you have more specific questions, don’t hesitate to contact your chosen email provider directly.
 Web HostingAffordable Canadian web hosting, user-friendly and reliable.
 WordPress HostingFast, reliable WordPress hosting in Canada. Perfect for blogs and businesses.
 Email HostingCreate branded email accounts with simple, affordable email hosting.
 Reseller HostingStart your own hosting business with flexible reseller hosting plans.
 Affiliate ProgramJoin our affiliate program and earn commissions by referring customers.
 DomainsFind the perfect domain for your business or personal site with ease.
 Domain TransferTransfer your domain to us and keep your website running without interruption.
 WHOIS LookupQuickly find who owns a domain with our easy WHOIS search tool.
 VPS HostingReliable VPS hosting crafted for performance and peace of mind.
 Managed VPSNo technical skills? Let us manage your VPS for you.
